Low-Poly Asset Modeling and Optimization: From Image to Blender and Game Engines
When building indie games or real-time 3D web experiences, asset production is often the single biggest bottleneck. Crafting unique props, weapons, characters, and environmental objects by hand can take dozens of hours per model. Even worse, beginners and experienced developers alike often run into the dreaded “engine import nightmare”: bloated vertex counts, chaotic UV maps, non-manifold geometry, and heavy uncompressed materials that bring frame rates to a crawl.
To streamline this workflow, I developed an open-source pipeline: triposr_to_3d on GitHub. It converts a single 2D concept image or photo into a textured 360° 3D mesh (OBJ format) equipped with automatically baked PBR (Physically Based Rendering) texture maps.
In this guide, we will explore how to configure the environment, generate assets from scratch, import and optimize them in Blender, and export clean, high-performance low-poly models ready for game engines like Godot, Unity, Unreal Engine, or Three.js.
The Core Problem: Why Raw 3D Scans and AI Meshes Fail in Real-Time Engines
Generative AI models and 3D photogrammetry tools have made enormous strides. However, feeding raw AI output directly into a game engine is a recipe for performance disaster:
- Polygon Density Overkill: Standard marching-cubes or voxel reconstructions generate hundreds of thousands of redundant, jagged triangles across flat surfaces.
- Messy Topology: Triangle soup without edge loops makes rigging, skinning, and lighting calculations unstable.
- Chaotic UV Mapping: Without coherent UV seams and proper texel density, textures become blurry or cause mipmapping artifacts.
- Disjointed PBR Channels: Real-time engines rely on standard PBR workflows (Base Color, Tangent Normal, Roughness, Metallic, Ambient Occlusion). Simply having vertex colors or an unlit diffuse texture looks flat under dynamic lighting.
The ideal pipeline combines automated generation with algorithmic optimization and targeted manual refinement in Blender.
1. Setting Up the Environment for triposr_to_3d
triposr_to_3d is built on top of the TripoSR neural architecture (developed by Stability AI and Tripo AI). It introduces edge preservation, quadric decimation, automatic background removal, frontal texture reprojection, and multi-scale PBR map baking.
Best of all, it is tuned to run comfortably even on budget hardware, such as an NVIDIA GTX 1650 with 4 GB of VRAM, or in CPU fallback mode.
Prerequisites
- Python: 3.10.x (recommended for PyTorch and CUDA compatibility)
- Git & Git LFS
- NVIDIA GPU with CUDA support (CUDA 11.8 or 12.x) or modern multi-core CPU
Step-by-Step Installation
Clone the repository and set up a clean Python virtual environment:
git clone https://github.com/aiw3ndil/triposr_to_3d.git
cd triposr_to_3d

# Create a virtual environment using Python 3.10
python3.10 -m venv venv
source venv/bin/activate
Next, install PyTorch with GPU support matching your CUDA driver. For example, for CUDA 12.1:
pip install torch torchvision --index-url https://download.pytorch.org/whl/cu121
Then install the remaining pipeline dependencies:
pip install -r requirements.txt
The core libraries include:
rembg(powered by U2Net) for background removal and clean alpha isolation.trimeshandfast_simplificationfor mesh manipulation, geometry cleanup, and quadric decimation.xatlasfor automated UV unwrap calculation without overlapping islands.moderngl&scipyfor surface baking, filtering, and multi-scale normal generation.transformers,einops, andomegaconffor running the TripoSR neural reconstruction model.
Tip for disk and cache management: If your root partition has limited space, redirect PyTorch and Hugging Face cache directories before launching:
export HF_HOME="/your/larger/disk/huggingface_cache"
export U2NET_HOME="/your/larger/disk/u2net_cache"
2. Generating 3D Assets from 2D Images
To generate a game-ready asset from a single image (for example, a sword, shield, potion bottle, or prop), run:
python triposr_to_3d.py sword.png --format obj
This single command triggers an automated pipeline:
- Foreground Segmentation:
rembgremoves background noise, isolates the silhouette, and centers the subject. - Edge Enhancement: Unsharp mask filtering highlights high-frequency silhouettes before passing tensors to the Large Reconstruction Model (LRM).
- 360° Geometry Generation: TripoSR synthesizes the triplane representation and extracts an isosurface via Marching Cubes (
--mc-resolution 320). - Taubin Smoothing & Decimation: A non-shrinking Taubin filter eliminates stepped voxel noise without eroding sharp edges, followed by quadric simplification to cap faces (default: 60,000 faces).
- UV Unwrapping & Frontal Reprojection:
xatlascomputes atlas coordinates, and photographic frontal reprojection projects the original high-resolution pixels directly onto visible faces for pin-sharp details. - PBR Map Synthesis: It generates
texture.png(Albedo),normal.png(tangent normals),ao.png(Ambient Occlusion),roughness.png, andmetallic.png.
Useful Command Flags
| Flag | Purpose | Recommended Use |
|---|---|---|
--format obj |
Exports as standard Wavefront OBJ with linked MTL and texture maps | Default format, universally compatible across all 3D software |
--max-faces 30000 |
Limits face count during initial extraction | For mobile or low-spec target budgets |
--normal-strength 2.5 |
Amplifies micro-surface depth in the normal map | Stylized props, hammered metal, stone carvings |
--texture-resolution 2048 |
Bakes a high-resolution 2K texture atlas | Hero assets and close-up camera items |
--chunk-size 4096 |
Manages chunk evaluation size | Ideal for 4 GB VRAM cards |
Output files are neatly collected inside output_triposr/<image_name>/:
output_triposr/sword/
├── modelo_3d.obj
├── modelo_3d.mtl
├── texture.png
├── normal.png
├── ao.png
├── roughness.png
└── metallic.png
3. Post-Processing & Optimization in Blender
Once the base model and texture atlas are generated, open Blender to inspect and finalize the asset for production.
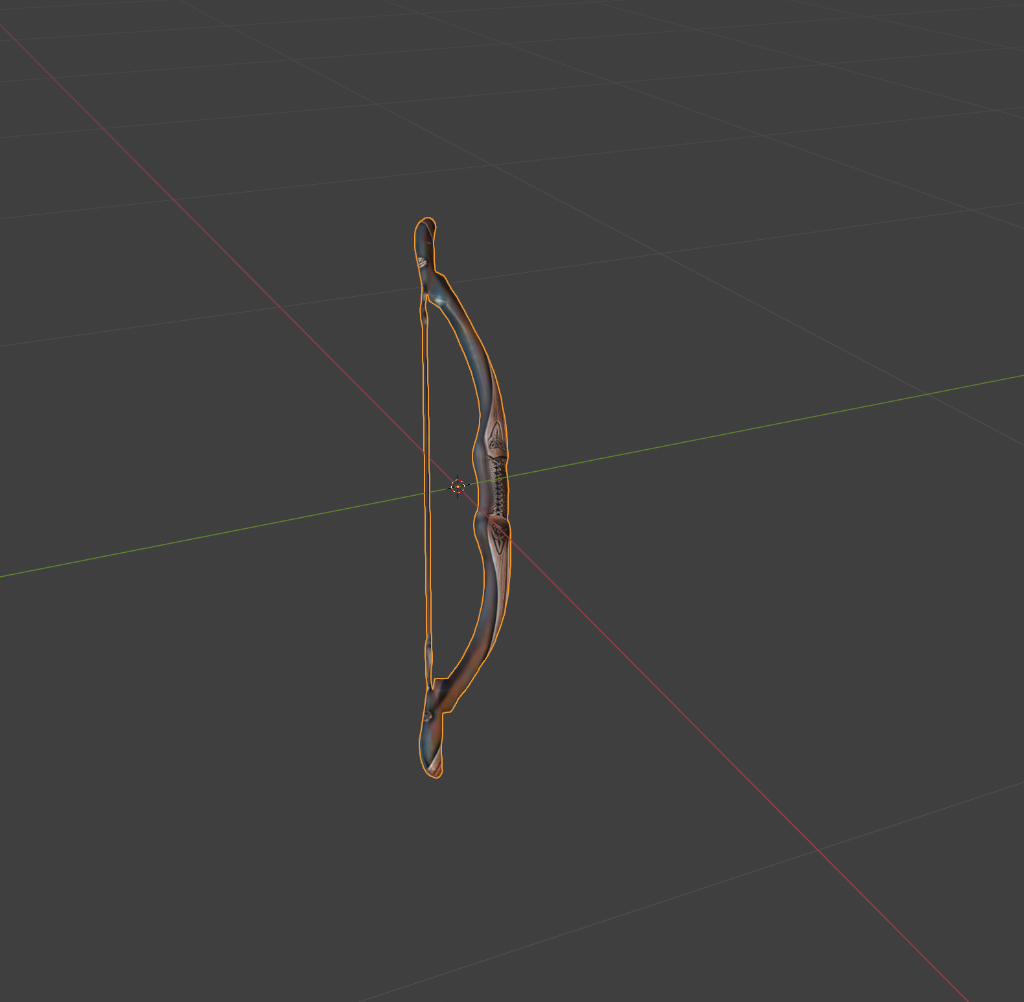
A. Inspecting Geometry & Normals
- Import the generated file via File > Import > Wavefront (.obj).
- Switch to Edit Mode (
Tab) and check for flipped normals:- Open the Viewport Overlays dropdown and toggle Face Orientation.
- Blue indicates outward-facing normals; red indicates inverted faces.
- If any faces appear red, select all (
A) and press Shift + N (Recalculate Outside).
- Clean floating geometry and manifold errors:
- Go to Mesh > Clean Up > Delete Loose Geometry.
- Run Mesh > Clean Up > Degenerate Dissolve to eliminate zero-area faces and collinear edges.
B. Decimation vs. Retopology: Meeting Budget Targets
Depending on your game genre, target platform, and camera distance, your polygon budgets will differ:
- Mobile / WebGL (Three.js): 500 – 3,000 triangles per prop.
- PC / Console Indie (Godot / Unity / Unreal): 2,000 – 15,000 triangles.
- Hero Props / First-Person Items: 15,000 – 40,000 triangles.
In Blender, add a Decimate Modifier:
- Select Collapse.
- Adjust the Ratio (e.g., from
1.0down to0.2or0.1). - Enable Symmetry if your object is mirrored along an axis.
- Check Planar decimate mode if your prop has large flat planes (e.g., walls, shields, tabletops).
Because triposr_to_3d already applied Taubin smoothing and initial quadric simplification, decimation in Blender cleanly preserves the silhouette while shedding thousands of unnecessary interior vertices.
C. Origin Point & Real-World Scale
Never export an asset with an arbitrary pivot point:
- Position the 3D cursor at the base of your object (e.g., where a prop touches the ground or where a sword handle is gripped).
- Right-click the model and select Set Origin > Origin to 3D Cursor.
- Align the object to the center (
X: 0, Y: 0, Z: 0). - Apply all transformations by pressing Ctrl + A > Apply All Transforms (Location, Rotation, Scale). This ensures animations, physics colliders, and engine transforms behave predictably.
4. Texturing and PBR Material Setup for Game Engines
Game engines achieve photorealism through Physically Based Rendering (PBR), requiring standardized texture channels:
[ Albedo / Base Color ] ────> Base Color Input
[ Tangent Normal Map ]   ────> Normal Map Node (set to Tangent Space)
[ Ambient Occlusion ]    ──┐
[ Roughness Map ]        ──┼─> Packed into ORM Texture Channels
[ Metallic Map ]         ──┘
Channel Packing (The ORM Standard)
In production engines (especially Unreal Engine and Godot), reading three separate black-and-white textures for AO, Roughness, and Metallic wastes video memory and draw calls. Instead, we pack them into a single RGB texture known as ORM:
- Red Channel: Occlusion (Ambient Occlusion)
- Green Channel: Roughness
- Blue Channel: Metallic
When working with .obj, triposr_to_3d outputs modelo_3d.obj and modelo_3d.mtl alongside individual PBR maps (texture.png, normal.png, ao.png, roughness.png, metallic.png). When setting up and fine-tuning the shader in Blender:
- In the Shader Editor, ensure your Normal Map image node has its Color Space set to Non-Color.
- Connect the Normal Map output to the Normal input of the Principled BSDF.
- Plug the base texture into Base Color.
- Set Roughness and Metallic values using the generated texture maps.
5. Exporting to Engine: Best Practices
When exporting from Blender to game engines or 3D applications, Wavefront (.obj) remains the most universally compatible and reliable format:
- File > Export > Wavefront (.obj)
- Under Include, check Selection Only and limit to your target mesh.
- Under Transform, ensure
Forward: -Z ForwardandUp: Y Up(or your engine’s coordinate system). - Under Geometry, enable Apply Modifiers, Write Normals, and Include UVs.
- Keep your exported
.obj,.mtl, and texture atlas in the same asset folder for direct drag-and-drop into Godot, Unity, or Unreal.
Summary and Workflow Checklist
Here is the quick reference workflow to go from concept to engine in under 5 minutes:
- Source or capture a clean 2D image with distinct silhouettes and clear lighting.
- Run
triposr_to_3d.pyto extract geometry, bake UVs, and generate multi-scale normal and PBR maps:python triposr_to_3d.py asset.png --format obj --max-faces 30000 - Import into Blender, verify face normals (
Shift + N), set origin to base, and apply transforms (Ctrl + A). - Tweak decimation to hit your project’s polygon budget.
- Export to
.obj(or your engine’s target format) with material definitions and drop directly into your game scene.
Check out the code, run it locally, and contribute on GitHub: 👉 https://github.com/aiw3ndil/triposr_to_3d